 Need a
super-quick Christmas gift? I’m sure I spent more time deciding on fabrics for
“Stable Stack” than I did actually cutting and sewing it!
There’s a
link at the bottom for a printable template page.
Here are the
supplies you’ll need:
Background 5
½” x 14”
Border (2)
1 ½” x 14”
(2)
1 ½” x 7 ½”
Scraps
for Stable—Outer
and Inner
Halo
Cow
Camel
Angel
Star
Backing (1)
9” x 17” approx.
Thin
Batting (1)
9” x 17” approx.
Fusible
Web 1/8 yd
Ribbon
(12”) or Small Hanger
Print the
template page and trace each element onto the paper side of your fusible web,
leaving at least ½” between the designs. Trace on the dotted line for the Inner
Stable. Cut the pieces out ¼” or more away from the traced lines.
 Press each
traced design to the wrong side of the fabric you’ve chosen for it, following
the fusible web instructions. Cut out each one on the line you traced.
 Remove the
paper from the wrong side of the pieces. Crease your Background rectangle in
half lengthwise to provide a guideline for centering the designs. If you have a
light box, you may simply lay the template page under your Background fabric to
see how to place the pieces. Once they’re in place, press them to the
Background.
Sew the 14”
Border strips to opposite sides of the Background and press. Add the 7 ½” strips
to the top and bottom edges and press.
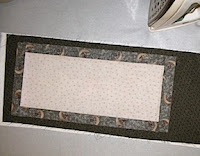
On your work
table, lay the batting, backing (right side up), and pieced top (right side
down) as shown in the photo and pin. Begin sewing near a lower corner and sew
¼” from the edge all the way around, leaving a gap for turning.
 Clip the
corners and turn the piece right side out. Press. Topstitch 1/8” away from the
outer edge all the way around, sewing the gap closed. Quilt if you like or leave
it un-quilted.
Tie a knot
at each end of your ribbon. Use small safety pins on the back going through to
catch the knots to hold the ribbon in place, or hand sew the knots to the
hanging.
Merry
Christmas, Friends!

No comments:
Post a Comment