Tuesday, September 6, 2011

The Value of Values


Over the past couple of years I’ve been learning a good bit about upholstery and home dec sewing. (And I still have MUCH to learn.) Through this work I’ve been privileged to see some absolutely gorgeous homes. I think it’s great fun to observe the impact of textiles on a house. Fabric accents—from curtains to pillows to art pieces and more—have the power to calm, brighten, enthuse, and harmonize, to name only a few effects. The opposites of all those positives are out there, too, and, of course both positives and negatives are extremely subjective. 

I imagine that most of the population (and I know EVERYBODY-ha, ha) pays little attention to the “fabric of our lives”, but for those of us who do, isn’t it a pleasure to walk into a room, enter a store, or peruse a decorating magazine and analyze its effect on us? Do you look for fabric touches and try to determine if they’ve been included intentionally or simply because, let’s say, a sofa was needed and someone liked the color red?

All that to say, if you’re dissatisfied with one of your own rooms and hoping to improve it with textiles, there are some general design principles that may help as you make decisions. There are plenty of brilliant, gifted, generous designers who share their knowledge through a variety of media, so I won’t attempt to list all the possible considerations for changing or adding to your décor, but I do want to remind you of one that is true for quilting, home dec, and the visual arts. It’s VALUE. Unfortunately, that’s an overused word that can mean several things, but in relation to design it means how light or dark something is. For a room, a quilt, a painting, etc., to produce the effect you want—visually, as well as emotionally—it’s critical that there be some difference in value included, be it a subtle or a bold one.  An extreme illustration of a lack of value difference would be a room in which every single element is white. Take that example further and imagine that every piece of furniture is made of wood that’s been painted white. Pretty boring, huh? Now imagine adding cappuccino-colored cushions to the sofa and chairs, and then a few throw pillows in medium to dark shades of brown (or red or green or blue. . .).

I’m probably not telling you anything you haven’t heard, but if you’re new to quilting or home dec sewing, you may be intimidated by the amazing amount of choices that are out there. Before I go any further, though, let me say that if you really like a combination and you’re the one who’s going to be living with it, FORGET THE RULES! But it may be that observing the “value rule” will make you even happier with your choices.

One of my first upholstery projects was a sweet little wingback chair for an artist friend of mine. Look at the photo and think about what makes the chair and the room work. It may not be your style, but I’m sure you’ll appreciate the beauty of her choices both in color and value. Send a photo of one of your favorite rooms to kara@greenchairstudios.biz, and I’ll share it here in the blog.

One last fun thing: www.polyvore.com is a website that was originally geared toward wearable fashions, but now has some fun interior design pages. You can use Polyvore to create a layout of a group of individual items you like. It’s fairly simple to use, so if you’re in the mood to play interior decorator or fashion consultant, it’s the place to go.

Wednesday, August 17, 2011

Stringing You Along. . .Part Two


There are a number of ways to finish the table runner. I experimented with a new idea and was happy with the results. The steps below explain it.

Lay the fabric for the sides—we’ll call it Fabric A—on your cutting table right side up. Place the batting with the string path on top of it, right side up. This may seem counter-intuitive, but trust me on this! Trim Fabric A to match the edges of the batting and pin in several places to keep the pieces aligned.
Set your machine on the longest straight stitch it will sew. Stitch through all layers along the lines you drew in the very first step. These lines are covered with fabric now, so you’ll have to estimate where the lines are, based on where you trimmed the string path. It isn’t critical that you sew exactly on the original lines.
Turn the piece over and cut Fabric A ½” away from the stitching toward the center of the piece. You can eyeball the ½”. Cut beside both lines that you sewed in the previous step. 'Thought I took a photo of this step, but I can't find it. At this point, there will be a channel of Fabric A cut away (1/2" from the long stitches you just sewed).

Remove the long stitches, and bring the Fabric A pieces around to the top side. Lay them in place beside the string path, with outer edges of the Fabric A pieces matching the edges of the batting. Fold under ½” along the curves and pin the edge in place on the string path. You’ll need to clip any concave curves almost to the seam line every ½” to get a nice, smooth fold.

Using the same thread that you plan to quilt with, topstitch as near the folded edges as possible, sewing through all layers.

Before cutting the back to fit, lay it on your cutting table right side up. Lay the table runner on it, wrong side up, and pin the edges. You may trim the backing fabric to match at this time or after you sew around the edge, which is my preference. 

Begin sewing near the center of one end, backstitching as you start. Sew around all four edges, leaving a 6-8” gap for turning the runner right side out. Backstitch where you stop.

Clip diagonally across the corners almost to the seam line. Turn the runner right side out and press, folding under the fabric at the gap ¼”. Topstitch all the way around the edge a SCANT ¼” away. Quilt as much or as little as you like, and you’re done!

Monday, August 8, 2011

Stringing You Along. . .Part One


If any of you were holding your breath waiting on the string-pieced project that I promised in the last blog—I’m sorry! Should I send flowers or a memorial gift?

I’ve been surprised lately that my taste in home décor is leaning more and more toward the contemporary. You’ll see it reflected in the project that follows. But I sincerely hope you’ll imagine the possibilities for making it in several different styles.

The instructions are for a particular size table runner, but don’t hesitate to ask if you need help figuring out yardage or pieces to cut for a larger or smaller version.

STRING-PIECED TABLE RUNNER ~ 15” X 48”

Cut a piece of cotton batting 15” X 48”. Using a permanent marker, draw two curved lines along the length of the batting. These lines are the “path” for string piecing. If you prefer something less freeform, use a ruler and draw 2 straight lines that are 4” apart.

Gather a pile of scraps or strips left from other projects for the string piecing. It’s helpful but not essential that the scraps have at least one straight edge. If you can sew a straight line without a straight edge as a guide, you can use any scrap that’s at least 1”-wide and as long as the width of your string path. I decided to create a color gradation as I went along, but choosing pieces randomly would be pretty, too (and simpler and quicker).

Place a strip in the approximate center of the string path, right side up. Lay a piece at a slight angle on top of it, right sides together, but not lining up the edges of the strips.

Flip the second piece away from the first to see if the drawn lines will be covered once the strip is sewn to the first. 

Sew a straight line along the right-hand edge of the top strip 1/4” away. It should begin and end at least ¼” beyond the lines you drew on your batting. Trim the seam allowance of the underneath piece if you’re concerned that it might show through or if you want to eliminate some bulk. Appliqué scissors are helpful for this step. You may trim the ends of the strips ½” away from the drawn line at this time or later.

Flip the second strip away from the first, and press it with your fingers. Since the batting is cotton, the strip will cling to it, and you may not even need to use an iron to press. I didn’t press with an iron until I had sewn all the strips to the batting.

Continue adding strips, varying the angle with each one that you add. Notice in the photo that even oddly shaped pieces can work. You may straighten out the edge before or after sewing it. 

Cover the string path all the way to one end and then begin adding strips going the other direction from the center.

After covering all of the string path, trim the edges to where you stopped sewing when you added the strips.
For the fabric that will be on each side of your string path, you'll need 1-1/2 yards. That will include enough for the backing. I’ll explain the remaining steps in the next blog. In the mean time, sew your strips to the batting and let me know how it’s coming along for you.


Thursday, June 16, 2011

I'd like to teach the world to string. . .

I’ve been surprised at the lack of response to “string-pieced” patterns from my own company as well as those from other designers, in my experience as a buyer for quilt shops. Something about the technique seems to be a little scary. My guess is, looking at a photo or diagram of a string-pieced project, it’s clearly not a strip-pieced pattern; in fact, it looks like a lot of small, asymmetrical pieces that require a lot of small, asymmetrical templates. That’s not to say there aren’t any quilters out there who enjoy sewing a project that involves a large variety of unusually shaped pieces, but I believe it’s safe to say they’re in the minority. And I’m also not saying that all string-pieced projects are alike in appearance or construction.  The general description of the technique that I’d like to encourage you to try is: sewing strips of many sizes to a base—fabric or paper—at a variety of angles. Depending on the fabric you’re using, the finished result can be very traditional or very artsy phartsy (my personal favorite).  Below is a photo of a mini-quilt--approx. 7" x 9"--that I string-pieced using mostly batiks, with an ornament attached to it. In the next post I’ll give instructions for making one similar to it. In the meantime, try doing a search for “string pieced quilts” and your interest may be further peaked. I recently added a string-pieced quilt to the Free Patterns tab of my website www.seamsndreams.com, which I hope you’ll take advantage of.

Sunday, May 15, 2011

Meet the Neighbors

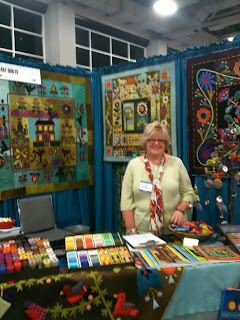
Cotton, silk, wool, hand dyes, fleece, flannel, and bucket loads of inspiration fill just about every square inch of Quilt Market! And there’s something for every taste and style.  I used to wonder why some people would walk right past my booth as though I were invisible, but now I realize that when I escape the booth for a brief exploration of the “neighborhood”, I, too, tend to use my peripheral vision to eliminate from my itinerary those vendors who are selling things I happen not to need or vendors with a style that doesn’t suit me. This saves precious time in an exhibit hall that covers a few square miles.


My “neighbors” to one side this Market were “Izzy & Ivy Designs” http://www.izzyandivydesigns.com/who were selling patterns for some of the cutest little girls clothes I’ve ever seen.  On the other side were the “Oh My Bloomin’ Threads” ladies http://ohmybloominthreads.com/ with dozens of delightful samples of embroidered sentiments found in their patterns.  Sue Spargo http://www.suespargo.com/ wasn’t technically a neighbor, but I just had to share the fabulous sense of color, whimsy, and style exhibited in her quilts. Multiply these three inspired and inspiring pattern companies by about 200 (a guess), throw in numerous fabric companies showing products to come, and you have a glimpse of the wonder of the International Quilt Market. The good news is that, although attendance is restricted to qualified wholesalers, all these wonderful products are bound for the shelves of local quilt shops and online retailers, where you can enjoy them, too!

Wednesday, May 11, 2011

Getting Ready for Wonderland

GETTING READY FOR WONDERLAND—written about a week ago.
Perhaps you’ve wondered—that is, if you’re a rabid. . .no, I mean avid, quilter—what it’s like to participate in the International Quilt Market. For the uninitiated, it’s THE place where all aspects of the business of quiltmaking are staged and promoted.

To be held in Salt Lake City May 12-15, Spring Quilt Market is fast approaching. In fact, as a vendor (and someone trying to make a living with a pattern company) I’ve officially hit the large button labeled “PANIC!” as I try to finish up the text for new patterns, make lists of things to take, leave my house in order—its’ for sale—and a host of other imagined and real needs.

But despite all the apprehensions about jumping through the Market rabbit hole, I press on with anticipation of the new ideas and old friends I’ll see in Market Wonderland. The color, creativity, camaraderie and general splendor of the Main Hall, wherever the (wholesale) Market takes place, is a bit surreal as you attempt to take it all in.

The thing that impresses me most about the quilting business—and is impressed upon me whenever I have the privilege of participating in the IQM—is the general joy and authenticity found in the people involved, both at the wholesale level and the retail end of it all.

What a privilege to be part of this! And I want you to feel it, too! I’ll post a few photos and market stories in the coming weeks, in hopes of at least entertaining you, if not fanning your creative spark. www.seamsndreams.com

Wednesday, May 4, 2011

The Fabric Gene


You know you’ve got it without running a test or taking a quiz of some kind. Color, texture, design, and quality of workmanship in cloth—a 10”-square or a thousand bolts in one room—produce a delight you may or may not be able to explain. Perhaps you recognized it long ago and have no difficulty explaining the happiness you feel in a textile-focused environment. I’ve had a love affair with fabric for as long as I can remember. My mom (from whom I got the fabric gene) asked me recently, “What would you say is your earliest memory [about anything]?” My immediate answer was “In the delivery room, I remember thinking, ‘Why are these people dressed so drably?’” No. . .really. . .my answer was that I remember wearing a white and red polka dot—seems like they were GIANT polka dots—dress. I know this to be an early memory because one day when I was in my teens, while helping clean out the family storeroom, I ran across the dress and it looked like a Size 2. At the time, thinking about that dress gave me an unexplained delight—and it still does.  Hence, the collection of polka-dot fabrics that have a place of honor beside my beloved batiks and hand-painted pieces. What little stack of fabric in your stash brings that sort of delight? Describe it, if you will, and let the rest of us with the fabric gene enjoy it with you!